Saturday, April 28, 2012

I want to punt this chocolate cake.

So today I started trying out chocolate cake recipes for Jared and Heather's wedding. The only thing that is good about this cake is that I discovered a frosting recipe that I will not be using. Ever again. Ever.

I used the chocolate cake and chocolate cream cheese frosting recipes from the Georgetown Cupcake Cupcake Diaries cookbook. Chocolate cream cheese frosting just sounded SO GOOD to me and I know it's good when I get it at Georgetown Cupcakes but this is the most difficult icing I've ever worked with. It is hard and dry and refuses to be piped. Absolutely refuses. I was going to work on frosting roses today but that idea went straight out the window as soon as I felt this frosting. I had to get out the widest tips I had to pipe even a minimal amount of this icing.

But let's start at the beginning.

I baked two 6" layers of chocolate cake and it was from legit the most delicious cake batter I have ever tasted. I haven't tasted the actual baked/iced cake yet but I hope it lives up to how it tasted in batter form. So anyway, I baked off the two layers:


They smelled delicious so I hope they taste just the same.

Then while the layers cooled I made the frosting. The evil, evil frosting (it looks like chicken below, hahahahahaha):


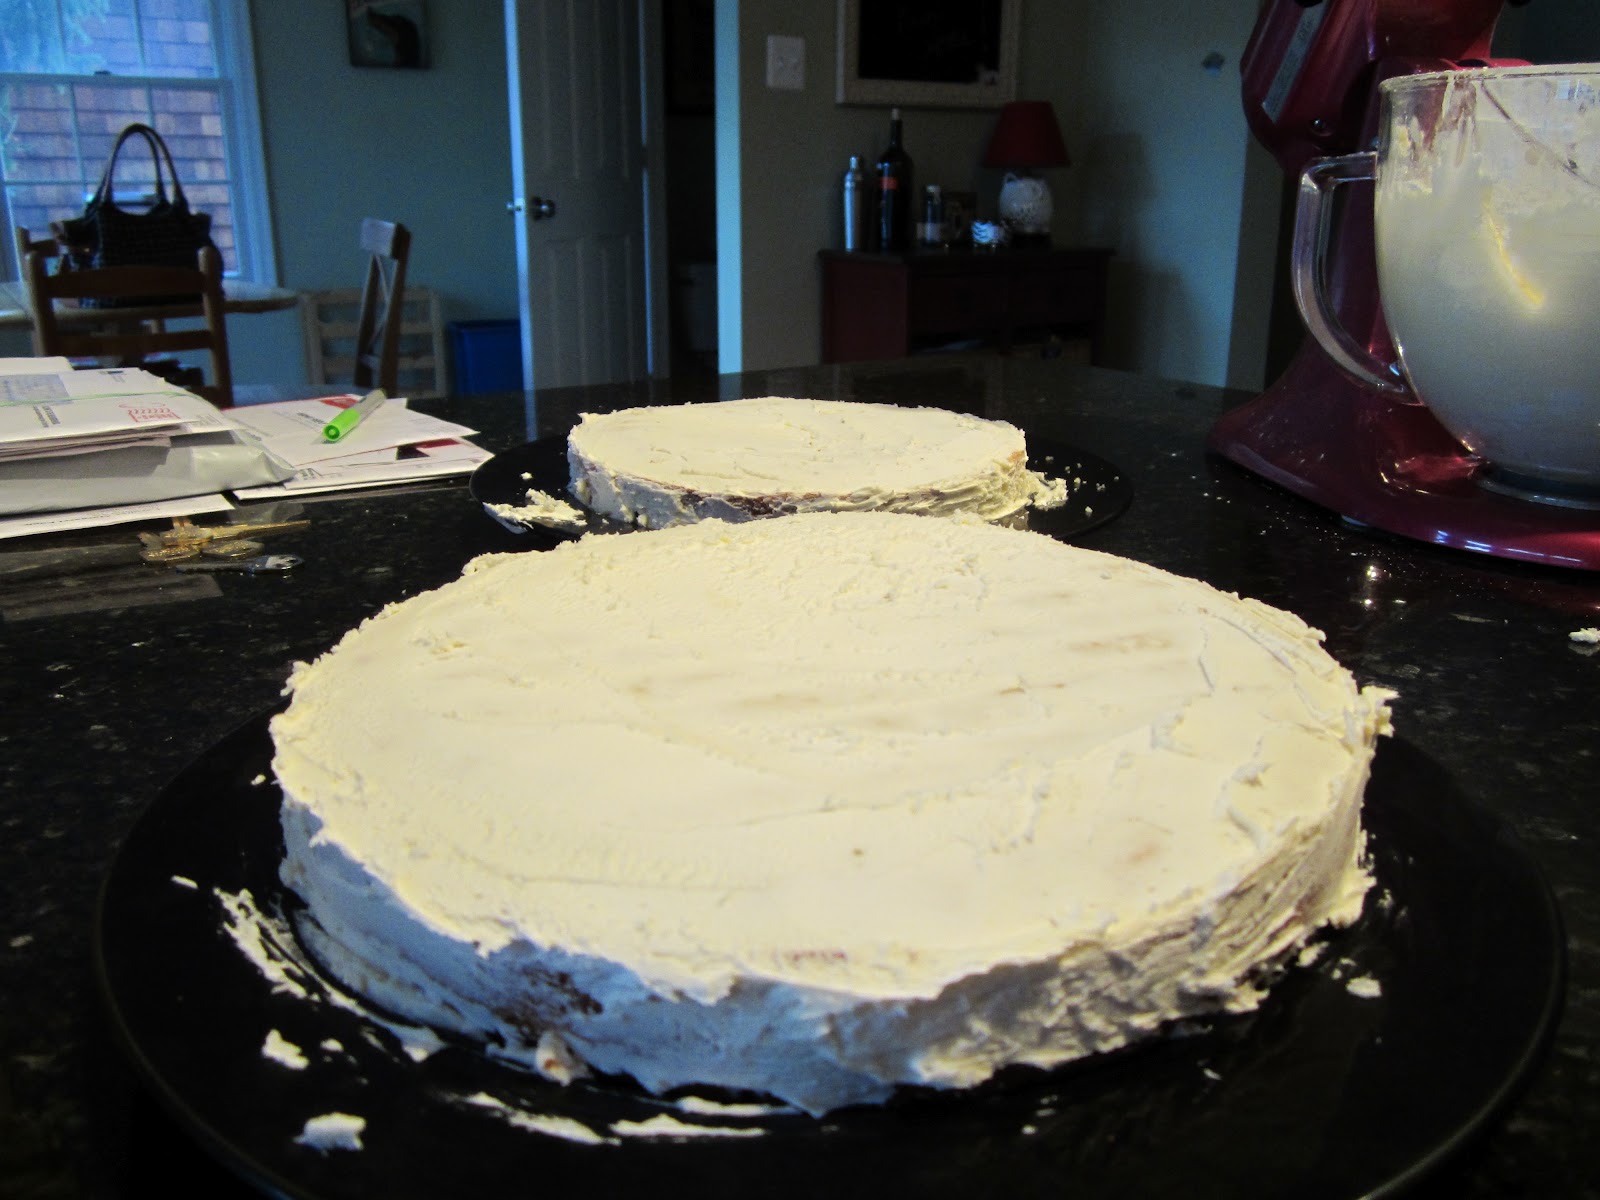
Don't get me wrong...it tastes delicious. It tastes exactly like the filling in a Milky Way (minus the caramel). It's just SO HARD to work with. I torted the layers, filled them with raspberry jam, and attempted to dirty ice the cake...but this stupid frosting didn't want to stick to the cake. It just kept falling right off. I couldn't believe it. Finally I forced it to stick to the cake and put it in the fridge to cool. 

I tried piping when I took the cake out of the fridge but the cake was NOT having it. Well, the icing wasn't. I couldn't force the frosting through the small petal tip I was trying to use to make stripes on the cake or a rose. I switched the petal tip out for a large circle tip and piped a two pearl borders and then used a closed star tip to make some stars and some attempts at rosettes which also didn't work. Finally I decided to make a monogrammed cake for Jeremy and ended up with this...his monogram plus a little heart. Not the most fantastic thing I've ever produced. I'm still mad at the icing and my hand still hurts from piping. I also couldn't get the icing on the sides of the cake to smooth out. 


Oh, and can we talk about the leaning tower of cake here? I didn't do a great job of stacking this cake...


Sunday, April 15, 2012

The shower cake was a success!

So as you know I'm doing wedding cakes for two weddings, one in August and one in September, and I've been practicing. So I needed to try out my first tiered cake this weekend because I was recruited by my mom to make a "mini-wedding cake" for the bridal shower she was hosting for a friend. The bride, Carolyn, is marrying a family friend, Tommy. My family and Tommy's family have been celebrating Thanksgiving together for 20 years as of this year (which I cannot believe).

So I decided to do the almond/raspberry/white chocolate cake for the shower. I started on Friday afternoon/evening by baking, torting, dirty icing, and doweling/stacking the layers, as pictured in these photos:

Notice the strips around the larger pans - to be discussed below.  
Noodle I bought these lovely cooling racks with the gift certificate you sent me! 

9" layer, torted, stacked, and dirty iced 

6" layer, torted, stacked, and dirty iced 

both layers stacked and doweled
So I did a 6" tier with two layers and a 9" tier with two layers. The 9" tier was baked off and then put onto a 12" decorative cake board as you can see in the above picture. The 6" tier was baked off and then put onto a 6" cake board as you can (barely) see in the picture just above the last where I'm holding the tiny 6" tier. 

I used "MagiCake" baking strips on the 9" layers and they really did make a difference. They're quite simple when you think about it - they're just strips of fabric that you soak in cold water and then wrap around the outside of your pan and secure with what are basically paper clips. In the oven, they keep the outside cool so that it bakes at the same rate as the inside and the layer comes out much more even on top and much more generally evenly baked. The outsides of the layers weren't as dry as they've otherwise been. I also used a simple syrup bath on each of the layers this time, just brushed on with a pastry brush after the layer was torted and stacked. That also made a huge difference in the texture and taste of the cake, and I wholly recommend it. 

To stack the cake, I placed three bamboo dowels in the bottom layer before placing the 6" layer on top, then I sharpened and drove 1 bamboo dowel through the top and bottom layers (including forcing it through the cake board supporting the 6" layer). It was very sturdy as a result. 

I refrigerated the cake overnight and then piped it yesterday. I used my shell tip in various ways as well as a straight tip to do the swags on the bottom layer. Please see below for the finished product:


I drove the cake down to McLean from Baltimore and then my mom put a really cute Cupid's Arrow she had made through the cake when I arrived for the shower (idea found on Pinterest). Everyone really enjoyed the cake and the taste was much better than the first time I made it, so I'm hoping it'll just continue to get better with time! 


Tuesday, April 03, 2012

Help! I need somebody...

I need some ideas from experienced bridal shower attendees/hostesses.

What are fun games to play? My mom is throwing a shower in a couple of weeks and aside from providing the cake I'm also supposed to come up with a game to play...so what are the cool ones? What do all the hip ladies do at bridal showers these days?


Thursday, March 29, 2012

Attempt #3: "Nutella" cake with white chocolate buttercream and raspberry filling

Alright, Jared. Alright. I'm updating the blog. Are you happy now?

A couple of weeks ago, Jared and Heather came to visit (YAY) and it was awesome. Some of the highlights of the weekend:
I have no idea. 

Hezz looking at her iPad while Mugsy cases the joint. 
We had a wonderful time wearing sleeveless tops, buying Heather's wedding dress (woohoo!), eating wonderful meals (Cap'n Crunch French Toast, anyone?) and just generally having fun hanging out and being together. I am SO EXCITED that I get to see them again in a few short weeks when Jeremy takes me to Columbus as my 1 year anniversary present. He knew exactly what I wanted!

While they were here I decided to take advantage of the opportunity to give them a cake tasting. They tasted (thawed) pieces of the two cakes I've previously blogged, along with a cake that I baked fresh while they were there. I used the chocolate-hazelnut cake recipe from the Sky-High Cakes cookbook and the same white chocolate buttercream recipe as the first cake (which they both agreed they loved). I wasn't so sure how the recipe was going to turn out because I had to scale it myself from being a 3 layer 9" cake to being a two layer 6" cake, but it worked out in the end. Here are some pictures of the cake in progress:
toasted, ground hazelnuts combined with cocoa powder and other dry ingredients

white chocolate buttercream in progress

This time when I made the white chocolate buttercream I used the whisk attachment on the KitchenAid instead of the paddle attachment, and that made all the difference! The frosting whipped up nice and fluffy and light. I'll definitely continue to use the whisk attachment for buttercreams in the future. 

The cake turned out really well and I got a chance to use my cake comb  to create a nice texture on the side of the cake. It reminds me of old-fashioned cakes and I really liked it...although it took a really long time for me to get the frosting on the side of the cake thick enough to make the pattern without just scraping all the icing off.
Again, I used my shell tips to pipe the borders on the top and my straight tip to pipe the french dots/pearls along the bottom. I learned a new way to do that since this cake though and I think it'll be better for next time. 

Here's the finished cake:
I think everyone agreed that while they enjoyed the Nutella-esque chocolate hazelnut flavor, they didn't quite love the texture of the ground nuts in the cake. It made for a slightly gritty texture that wasn't very pleasant on the palette. So I think when we do the actual cake, we'll go with a straight chocolate instead of adding the hazelnut element. Jared, how does that sound to you?

So we had a very productive weekend. Lots of drinking, eating, cake baking, cake eating, wedding dress shopping and buying, and general loafing. I hope they enjoyed themselves enough to come visit soon and I hope they're looking forward to my and Jeremy's impending visit to Columbus :) 


Sunday, March 11, 2012

Attempt #2: Meyer lemon cake with raspberry filling and almond buttercream

So today I made my second attempt at finding the perfect cake/frosting for my friends' wedding cake.

I made a lemon cake (recipe from this book) using meyer lemons (which are a mix between lemons and oranges, therefore less tart than regular lemons). I used the same black raspberry jam as the last cake because it was delicious, and an almond buttercream (recipe from this book). The buttercream really took me out of my comfort zone, but more on that later.

I made the cakes in 6" pans this time because that 9" cake was HUGE and just way too big for just a tasting portion. The cakes cooked perfectly and then I set them out to cool:
Aren't they pretty?

After they came out of the oven I made a simple syrup flavored with the juice from the meyer lemons so that I could brush the cakes with it and keep them moister (is that a word?) for longer. Before I brushed them with the syrup, I leveled and torted each layer with this tool which is my new favorite thing (aside maybe from my new revolving cake stand). Basically, you just adjust the blade to the level you want it to be and shimmy it through the layer until it's level or cut in two. It was a little bit hard to lift the layers once they were cut in half because they were so delicate, but luckily none of them broke.

So to make the buttercream, first I had to boil water and sugar together until they reached the "soft ball" stage which means I had to buy a candy thermometer so I could see right when it got there:
which was SCARY. I'd never done it before but it was actually pretty easy. So while that was boiling, I was whipping up the egg whites in the KitchenAid:
until they were "frothy." So once the two were at the right stages, I drizzled the syrup into the egg whites and then whipped them together until they had cooled down to "body temperature" which was kind of hard to judge. I think I started adding the butter too soon because the buttercream never quite thickened to the state I am used to - but it is still delicious. So anyway, once they were whipped together I added all three sticks of butter (it's called buttercream for a reason) and whipped it all together until it reached the texture I assumed it was supposed to have. It's a glossy, delicious, light frosting but it isn't thick enough to pipe with, in my opinion.

I brushed the torted layers with the lemon simple syrup, then stacked them with the black raspberry syrup.

Finally I put a crumb coat on the assembled cake :

And then (impatiently) let it chill before I finished decorating it. This time I was working with my leaf tip, so I put leaf borders along the top and bottom of the cake:
It looked a lot better on the top than it did on the bottom...I think by the time I got to the bottom the buttercream was melting in the piping bag from the heat of my hand:

Then I just kind of got weird with the rest of the cake, and I personally don't think it looks great, but in the interest of full disclosure I'll include the pictures here...swirls on top of the cake with leaves + leaves and swags on the sides.


So! Will update again after we taste it :) Stay tuned. Will this be the winner??

Oh, and gratuitous pictures of the boys:


ADDING ON:
So we tasted it. I didn't like the texture of the buttercream...it was too soft for my taste. I personally like a sturdier buttercream. Maybe I just messed this one up, who knows. J liked the texture of this icing more, so I guess it's a matter of opinion. We both agreed that this cake was much moister but we weren't sure that was a good thing - was it too moist possibly? We liked the flavor of the icing more this time, but felt that the raspberry flavor of the filling got drowned out by the lemon flavor of the cake (which was strong). Not sure how this one scores for me personally. Too sweet I think...but in the end my opinion isn't the one that matters! The bride & groom have to love it! Jared, we'll see what you guys think when you come to visit THIS WEEK! Can't wait to see you two!

Sunday, March 04, 2012

Attempt #1 - Almond cake with raspberry filling and white chocolate buttercream

These are the awesome people for whom I am baking a wedding cake:
Once word got out that I was baking their wedding cake (via me telling everyone with my big mouth), I got a couple more requests (aka I demanded to make cakes for more people). I am also going to bake the wedding cakes for my friend Kelly and her fiance Ryan, as well as the wedding shower cake for a friend Carolyn (whose shower my mom is hosting).

So what do these events say to me? I better get practicing!

This weekend I was home alone (with only my two canine roommates) so I decided it was prime time for my first attempt. I decided to try an almond cake with raspberry filling and white chocolate buttercream. I took the cake and filling recipe from here and the frosting recipe from here (if anyone wants it I'm happy to share).

Yesterday I went out to three separate stores to gather all the ingredients. Did you know that the Whole Foods in Mount Washington chooses Saturday evenings to restock and therefore are out of a lot of things? Me neither. Now I do.

Side note: Almond paste, while hard to find, is delicious. I am thinking of making it a new main food group in my diet.

So first, make the batter using the beautiful KitchenAid mixer:


Butter makes everything better.  


Divide the cake batter among the 3 prepared pans. By prepared I mean I sprayed them with Pam and left them on the kitchen counter.  It would have been nice had they all been the same size, but they weren't. Such is the life of the underprepared.

I made a pretty huge mess baking this cake. Lucky for me, I had these two weirdos to help me clean up the floor (Notice Mugsy licking his chops). 


I meant to take picture of the layers after they were baked but I ran into some problems. The two smaller pans baked really unevenly. As in, half of each of the layers in the smaller plans were not baked. When I tested them, I happened to pick spots that WERE baked so I took them out of the oven, but when I released them from the pans I discovered the bad news. Luckily I was able to cut off the unbaked half of each of the bad layers and glue the two good halves together with icing. As such, my three layer cake became a two layer cake. Oh well.

I froze the layers (which was one of the best moves I learned from all the internet trolling I did, they were SO much easier to handle while frozen) while I made the buttercream,
 then I "dirty iced" them - for those who don't know, it's a thin layer of icing to trap all the loose crumbs so they won't come up in your top layer of icing. This is what the layers looked like dirty iced:
Dirty is apt, no? (I cannot wait for my turntable to arrive in the mail so I can ice more easily.)

After the dirty layer was applied, I stuck them back in the freezer while I filled my pastry bag. Again, I will NEVER use a pastry bag again without using this pointer (I was going to say tip but that could be confusing).

I took some time to admire my new piping tips in their tray in my little cake bakers toolbox (nerd alert):

When they came out of the freezer. I applied another layer of icing to cover the dirty coat (it still wasn't pretty). And then, I piped this cake as much as I possibly could (mostly to cover my own mistakes). I used the the largest open star tip I had, the largest closed star tip I have, and two round tips. I made shell borders along the top in opposite directions, then filled in with stars and some criss crossed latticework (if you can call it that). I piped some large french dots around the very bottom, and another shell border around the middle of the cake (since the two layers were slightly different sizes). Then I decided to try something I hadn't done before. I'd seen it on Cake Boss a bunch of times, so I decided to try "swags" (I think that's what they're called)...the little stripes of icing that scoop between two spots. And it was pretty successful! I can definitely use some more practice, but for a first shot I think it was good! Then I topped each swag with a flower from an open star tip.

Overall, it's still pretty messy and my piping/icing skills can use some work, but that's what practice is for right?


We'll see how it tastes...I'll let you know...but from what I've licked off my fingers, the verdict will be good :) I'll let you know about my next attempts!

ADDING ON:
We tasted the cake tonight. I had a slice and he had a bite (or two) of said slice. Why does a girl who loves baking fall in love with a diabetic boy? More cake for me, I guess. Anyway, my thoughts:

  • the raspberry filling is what makes this cake. it is the star of the show. next time i would not only put raspberry filling between each layer, i would tort each layer (cut it in half after it's baked) and throw raspberry filling in THERE too. 
  • making an entirely white cake (as in, all egg whites, no egg yolks, yes i do have ten egg yolks in my fridge right now) means that the cake is apt to dry out very quickly. i had the option of adding a simple syrup bath but chose to forgo said step. i would not do that again - it needs the bath...especially if it's going to be eaten the second day. then again, maybe by the second day the raspberry filling will have further saturated the layers, causing them to become more moist. we shall see. 
  • the flavors were spot on...i wouldn't change the flavors. very rich though, you need a beverage with this one. "light and refreshing" aren't words i'd use to describe this cake, but "indulgent" is. 
So. That was Trial #1. Left to try in terms of batters are wedding cake white, buttermilk (sounds interesting to me), lemon, and hazelnut. The only concern I have with almond and hazelnut cakes are that people with nut allergies will not get to have any cake. Jared, what are your thoughts on that? Have any close friends/relatives with nut allergies? I could always make special nut-free cupcakes for them to eat. I also need to try a classic vanilla buttercream and a swiss merengue buttercream frosting...but i think the raspberry filling is already there. 

Jared do you have an absolute lack of interest in any of the above flavors? If so, I won't try them. Also - what are your thoughts on cream cheese frostings? 

Tuesday, February 28, 2012

cake.com/excited

So the weekend that I got to see two of my best friends, Jared and Heather, I was additionally excited because I knew that Jared was going to propose to Heather that very weekend! Obviously Heather had no idea and was SHOCKED when it happened, and it was a joyful weekend all around.

I volunteered to bake their wedding cake and they agreed because I drugged them they're insane they love me and they know that I will think about nothing but making their wedding cake from now until September (when the wedding happens, that's not just an arbitrary date upon which I will stop thinking about it haha).

SO! I've already ordered two cookbooks off of amazon and am eagerly awaiting their arrival, and I've taken decorating classes in the past (multiple) and baked many birthday cakes, but never anything of this size. I know my extensive education in cake decorating watching of bakery-based reality tv shows has prepared me for this task, but I'm just reaching out to see if anyone has any other resources they recommend that I buy/read/obsess over for this task?

I'm going to visit a cake supply store this weekend and buy everything I can get my hands on select carefully from their selection so I can start practicing skills such as doweling the cakes. I'm assuming they'll have special cake dowels and I won't need to go to Home Depot for that, even though then Jeremy could get involved beyond being my primary taste tester which would be great.

I just can't wait to bring my tester cakes into work over the next few months and have people wonder why I keep bringing massive tiered cakes into the office for absolutely no reason.

Jared I know you read this blog, please don't take this as a sign that I won't be able to pull this off. I will. It's happening. You already said yes. You can't back out. I already stepped down from officiating the wedding which WAS MY RIGHT AS THE PERSON WHO INTRODUCED YOU TWO, so you can't take away this honor as well. Ok? Ok.


CAKE!

Tuesday, February 21, 2012

Thursday, February 16, 2012

YAYAYAYAYYAYAYAYAYAYAYAYAYAYAY

TOMORROW I GET TO SEE ONE OF MY BEST FRIENDS HEATHER AND HER BOYFRIEND JARED WHO IS ALSO A GOOD FRIEND OF MINE AND WE ARE GOING SKIING AND SNOWBOARDING AND IT'S MY FIRST TIME DOING EITHER OF THOSE THINGS AND I'M SO EXCITED, I'M SO EXCITED, I'M SO...


You thought I was going to say scared, didn't you? But I'm NOT! I'M JUST EXCITED!

I'm too EXCITED to SLEEEEEEEEEEEEEEEEEP!

Which is a good thing because we have to be on the road at 6 am.

These images perfectly describe how I feel: